Saturday, April 30, 2011

How to Troubleshoot a Windshield-Washer Pump

Follow these steps to determine why your windshield-washer fluid is not flowing freely, and soon you'll be driving with clean windows again. The problem may be something simple like a disconnected hose, or dirt in the spray nozzle.
   
Things you'll need:
  • Windshield-washer Fluid
  • Replacement Hose
  • Compressed Air And Air Nozzle
  • Funnel
  • Needle Or Pin
Instructions:


  • Turn on the windshield washer with the engine off and the key in the On position.
  • Listen for a humming sound to determine whether the windshield washer motor is operative. Open the hood and ask a friend to listen while you turn on the windshield washer. If you don't hear any sound, check the fuses.
  • Replace the fuse if it is blown. If the fuse is not blown and the motor is silent, have your mechanic replace the windshield-washer motor. If you hear the motor humming, proceed to step 4.
  • Check the reservoir and add windshield-washer fluid if its level is low or empty. You can fill the reservoir right up to the top-- usually it doesn't have any full or empty indicators. Use a funnel to avoid spills.
  • Check that the water is not frozen in the reservoir. This will only happen in cold weather if you filled the reservoir with plain water instead of windshield-washer fluid.
  • Make sure the small rubber hose that plugs into the windshield washer reservoir is attached.
  • Follow the hose to the rear of the hood. Check for crimped, torn or broken lines. The line from the reservoir splits into two lines at the hood. If damaged, remove the line by pulling at the base where it attaches. Bring it to an auto-parts store and purchase a hose of identical width and length. Install it and check for leaks.
  • Clear any leaves or debris away from the area around the washerfluid nozzles on top of the hood.
  • Clear the washer-fluid nozzle's passage with a needle or a pin.
  • Unhook the washer lines at the reservoir and at the hood, then force compressed air through the lines to dislodge anything stuck in them.
Source: eHow

Transmission Mount Bracket

If you're a hard off-roader, chances are you enjoy all the ruggedness of the terrains that you traverse and the vibrations created by these terrains. However, your engine and transmission may not take the effects positively. That's why you need to secure them not only with a mount but as well as with a motor and transmission mount bracket. Vibrations are damaging to the parts in your vehicle, more so to the engine and the transmission. They can cause parts to get dislodged from their mounting location and to get damaged, and even to damage other neighboring components. To protect the engine and transmission, they're held by their mounts. And, the mounts need a reliable motor and transmission mount bracket in keeping the parts secure. The bracket guarantees that the motor and transmission will remain firm no matter how great the amount of vibrations your ride encounters while you drive. Just be sure that you inspect the said part every now and then to see whether it's already damaged. Also, pay attention to such things as unwanted noise that may indicate a damaged bracket and your auto parts banging on other components.

Motor mounts (engine mounts) are used to connect a car engine to the car frame. They are usually made of rubber and metal. The metal portion connects to the engine on one side and to the frame on the other. The rubber is in-between to provide some flexibility (so engine shake doesn't cause the car to shake). Newer cars may use slightly different mounts, however, there purpose is the same. Provide the connection from the engine to the car frame. The number of motor mounts varies from car to car.

Symptoms of a Bad Transmission mount bracket:


Shaking

  • A bad transmission mount can cause your vehicle to shake and rattle severely while accelerating. This is often caused by a broken transmission mount, but may result from worn or damaged rubber blocks. If the transmission mount breaks completely, the transmission may shift during acceleration, causing a knocking or clunking sound. If the transmission shifts and twists severely enough, it may damage other components, which cand result in additional noise and possibly damage.

Noise

  • When the rubber blocks between the vehicle's chassis and the transmission mounts break free or become damaged, the vibration and noise from the transmission will be conducted through the transmission mount and into the chassis of the car. This is most often recognized as a roaring or vibrating sound that echoes throughout the vehicle during acceleration. If the sound is caused by bad rubber blocks, the transmission mounts may break, damaging the transmission.

Loss

  • Though rare, if a transmission mount becomes damaged and breaks, the transmission may become dislodged and fall from the vehicle. This will result in thousands of dollars in damage and is not easy to repair.

Fuel Tank Selector Switch

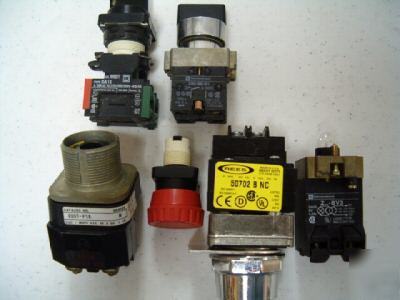
Anyone know what this button or switch is?

That is a Fuel Tank Selector Switch.

What's the use of an extra fuel tank filled with fuel if you can't gain access to it because of a damaged fuel tank selector switch? A dual fuel tank can be a great benefit to your vehicle. It reduces the chance of getting stranded at the side of the road because of loss of fuel. It also lessens the interval by which you visit the gas station for a fuel refill. For you to enjoy all these benefits, however, you need to keep the switch operating in top condition. This switch is your access to the two fuel tanks in your vehicle, opening and closing the door of the tanks to control which tank will be used. However, there are instances when the fuel tank selector switch becomes damaged. Exposure to harsh elements can cause the switch to break over time. And when this happens, you have no way of gaining access to one of the tanks in your vehicle. This may not seem like a problem at first, until your vehicle dies on you because of fuel starvation.


Sends power to the selector causing the door inside the unit to open and close swapping tanks. On a 92-96 Ford F series it is located to the right of the headlight switch, too the left of the instrument cluster. The tanks are supposed to run independent of the other tank and only the tank you chose should be supplying fuel. With age I find these tanks mess up in all sorts of ways. It is possible that the switch is malfunctioning and pumping from both tanks but as far as the front tank going from 3/8 to 5/8 when you filled up, by design that can't happen. What probably happened was the gauge settled down enough to read the actual fuel amount. I suspect a problem with the front tank since you can not run the gauge down to E whether because the gauge is reading wrong or the tank won't suck up gas that low in the tank.

Friday, April 29, 2011

Making sure the ABS wheel sensor is working properly, CLEAN it!!

There are many things that can cause your ABS light to come on. Some are serious, so you should never just ignore the light. But there are times when the light comes on and can be met with a simple solution. For instance, a dirty ABS wheel sensor can cause the system to trigger the ABS light during self evaluation. You'll be shocked when you see how much road gunk can accumulate on this very important sensor.
Even if your ABS light hasn't made an appearance, it's a good idea to clean the sensor. A good time to do it would be during brake pad replacement when you have the wheels off anyway.

What You'll Need:

  • Ratchet wrench and sockets
  • Ratchet extension
  • Jack
  • Jack stands
  • A strong rag
Get your stuff together and you're ready to start. Remember, it's never safe to work on a car supported by a jack, use jack stands!

Begin by loosening your wheel lugs, then jack the front of the car up and rest it securely on jack stands. With the car safe, remove the wheel lugs and take the front wheels off. With the wheel off, turn the steering wheel all the way in, opposite the side your working on. For example if your working on the passenger side, turn the wheel all the way toward the drivers side.


Locate the ABS wheel sensor (Shown in the picture above). Remove the bolts that attach it to the rest of the suspension. You may also need to remove a few bolts to pull the sensor away from the vehicle for cleaning. Follow the line to see if there are more bolts. Remember not to force it or pull too hard. Then along the line theres another two 10mm bolts, that need to be removed, just follow the abs sensor line to get at them. The initial bolts on this application are pictured below.

With the sensor free, take your rag and wipe the sensor until its clean. I prefer not to use any chemicals on the sensor to avoid potential problems. If you need to, use mild soapy solution and rinse well. Reinstall the sensor in the same manner it was removed. 

Source: Autorepair

Felpro

Federal-Mogul's Fel-Pro® brand is our premium sealing system and the industry’s leading brand of replacement sealing products for light vehicles, light trucks, medium-duty trucks and heavy-duty applications. This Federal-Mogul brand also includes specialty lines for performance, sport and marine engines.


Federal-Mogul engineers are continually pushing ahead with new sealing science, developing problem-solving products like PermaDryPlus® rigid carrier gaskets.

The Fel-Pro brand by Federal-Mogul is a leader in multi-layer steel (MLS) head gasket design, the current leading-edge technology in sealing today’s lightweight engine castings with a long-term, leakproof seal called PermaTorqueMLS®.

Because we’re a global producer of engine and sealing products, our aftermarket customers benefit from Federal-Mogul’s proven expertise in engineering and manufacturing OE components and subsystems for the world’s major automotive manufacturers. Our extensive field experience gives us insights into the expected changes in engine components over time. We design our aftermarket sealing parts to meet your specific needs in the replacement environment.